Back to Basics: Cinnamon Rolls
By Dawn Mikesellcinnamon, cinnamon rolls, sweet rollsBack to Basics: Cinnamon Rolls
I’m kind of a perfectionist, especially in the kitchen. When I make something, I want it to be the absolute best. Unfortunately, there are several areas where I fall short of a perfect mark. Cinnamon rolls were one of those things that took me years to perfect. I know some of you fall into the same category, so I’m here today to discuss the things that I have found make the perfect cinnamon roll. I understand that everybody has their own preferences, quirky ovens, different altitudes, and so on, but I hope that you can take what I’ve learned and apply it to your particular preferences and circumstances.
Many years ago when I would make cinnamon rolls, they would always end up spiraling up and out in the middle. Still delicious, but not exactly appealing to the eye. I learned that to prevent this, I needed to allow enough space between each roll on the baking sheet so they would have enough room to rise out instead of up. Allowing them to fully rise before baking them will also help with this.
After I resolved this issue, another one sprang up. My cinnamon, sugar, and butter filling would always melt out and pool on the bottom of the cinnamon rolls and bake into a burnt mess of hard-candy-not-goodness. I battled with this for years, trying every different method. From melting the butter and combining it with the cinnamon and sugar before spreading it onto the dough to spraying on a butter flavored cooking spray and then layering the brown sugar and cinnamon on top of that. Some methods worked better than others, but I was still not completely satisfied with any of the results.
My next problem was dry bread. They look amazing, but as soon as I’d bite into one, I got a mouthful of dryness with some frosting.
So, I have a brother-in-law who is an AMAZING cinnamon roll baker. I would request his cinnamon rolls at every Christmas party so I could have one decent cinnamon roll a year. This past Christmas, I asked him if he would show me his secrets. He gladly agreed. Yay!
The first thing I was doing wrong was that my dough had too much flour in it. You want a pretty sticky dough. Almost too sticky to handle. Don’t worry if they misshape while you transfer them from your counter top to your baking sheet. They’ll fix themselves when they rise and still look beautiful.
The next thing he did was spread softened butter onto the dough with his fingers. Messy, yes, but effective. I’ve adopted this method and it work well. Then he liberally sprinkled on some granulated sugar. You read that right, white granulated sugar. Traditionally brown sugar is used and you can certainly use that if it’s your preference. I kind of like the granulated sugar because it yields to the cinnamon, allowing the cinnamon to shine through more. Then he liberally sprinkled on some cinnamon.
From there, the method was pretty normal. Roll the dough up, long side to long side, slice into 1 1/2 to 2-inch slices, place on a baking sheet, and bake.
These small differences were just that: small. But they’ve made a world of difference for me. I can now bake up soft, moist, delicious cinnamon rolls that don’t have filling baked like burnt candy onto the bottoms. If you struggle with cinnamon rolls, I hope that these little tips will help you to bake the most amazing cinnamon rolls you’ve ever made.


- 2 cups warm milk
- 1/2 cup warm water
- 1/2 cup butter, softened
- 1 tablespoon salt
- 1/2 cup sugar
- 2 eggs
- 2 tablespoons SAF yeast
- 4-5 cups flour (white, wheat, or a combination)
- buter
- granulated or brown sugar
- cinnamon
- 2 tablespoons butter
- 3 cups powdered sugar
- 1/2 teaspoon vanilla extract
- 3-4 tablespoons milk
- Attach a dough hook to your stand mixer. Combine milk, water, butter, salt, sugar, eggs, and yeast. Mix at low speed until slightly combined. 30 seconds or so is enough.
- Add flour 1 cup at a time until the dough starts to come together, but still somewhat sticks to the sides of the bowl. Knead for 8-10 minutes.
- Turn dough out into an oiled bowl. Oil the top of the dough so it doesn't dry out while it rises. Rise for 1 hour or until doubled in size.
- Punch down and roll out into a rectangle about 1/2-inch thick on a floured surface.
- Spread softened butter onto the dough to 1/2 inch from the edges. The butter should be pretty thin, about 1/16-inch.
- Sprinkle sugar on butter to your preference. Keep in mind that too much sugar will result in a pooled burnt candy mess under your cinnamon rolls. Just eyeball it. A thin layer is good.
- Sprinkle cinnamon liberally over sugar.
- Roll tightly from long end to long end. Place seam side down. Cut into 1 1/2 to 2-inch thick slices and transfer to a greased baking sheet. Remember that because the dough is sticky, they might misshape in the transfer, but they'll fix themselves while they rise.
- Rise for 30 minutes.
- Bake at 350° F for 15-20 minutes or until golden brown on top.
- Remove from oven and allow to cool.
- For the icing, combine all the ingredients thoroughly. You may add more or less milk depending on your consistency preference.
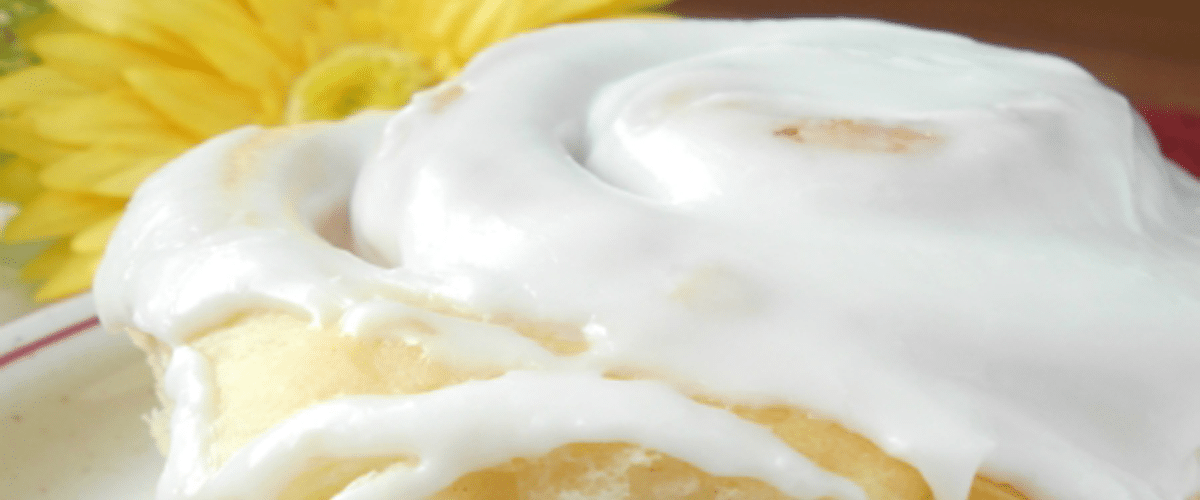
- When the cinnamon rolls are sufficiently cool, spread icing onto each one. (I personally prefer to ice mine when they're still a bit warm so the icing melts down into them a little.)
Looks Very Yummy! Thanks for Sharing this recipe Dawn!
Thank you for all your tips Dawn and your recipe is amazing. Best cinnamon rolls I’ve ever baked. Reminds me of my childhood when we called them snails and not cinnamon rolls.
I’m so glad you enjoyed them!
Ok I just wanted to belatedly thank you for contributing this to the internet… I used to make outstanding cinnamon rolls (not to toot my own horn ahem lol) but a friend convinced me it was a waste of time to spread butter filling and THEN top with sugar and cinnamon… “just mix them all together, and smear the mixed melted paste” she said with an eye roll. She’s a professional baker so I never dreamed her advice could be suddenly ruining my rolls but it WAS!! :O You’ve made me realize that right around that time (2 yrs ago now) was when I started having to battle the stickiest mess (like gross toffee that cements your jaws together, especially once it cools) in the bottom of the pan and I never knew why. Wow. Now how to awkwardly tell a “professional” she’s dead wrong!!
Haha! That’s so awesome. I’m so glad this was helpful for you!
I made this and my dough was too wet. I ended up adding more flour. Around two cups extra. Other than that they were perfect! Super soft and fluffy! The dough wasn’t too sweet. My family loved them! I only got a bite! They were all gone!
I have always made cinnamon rolls with brown sugar but the last two times my brown sugar isnt melting ?? Its crusty on top and my butter all in bottom of pan.
Honestly, I’m not sure. It could be that they were rolled too tightly or that your pan was too small, thus squeezing the butter out. It could also be that your sugar to butter ratio was too high or that there was too much filling. Maybe it could be that the dough was rolled too thin. If it’s not at least 1/2 inch thick, it can structurally lose its ability to hold on to the filling.
I’m so excited to see how this works out! I have had the same issue with the sticky Carmel at the bottom of my rolls the last few times i baked them… so frustrating after all the work. I cant remember if i used brown sugar or not because i was trying different recipes. So I am going to try this and see if I am able to fix the issue! Thanks for all your information!
Great! I really hope it works out for you!
They turned out perfect! Thanks so much
Another tip to prevent the filling from oozing out, is to substitute margarine for butter. Butter melts too easily, margarine has a higher melting point. Also, spread the margarine, do not melt it. Then after you have sprinkled the sugar – cinnamon mixture, use your hands or rolling pin to press the mixture into the dough. If the dough is too dry, this will not work.
Great tip! Thanks for sharing!
Does this really call for 2 cups of milk?
All other recipes w/5cups of flour say 1 cup.
I use 4 cups water to 10 cups flour in my bread recipe so this seems about right.
I got a soupy mess! 2. Cups of milk??
I’m so sorry this recipe didn’t work out for you. It is supposed to be a very sticky dough. Also, as with all bread recipes, the amount of flour is subject to the amount of humidity in the air. You may actually need to add more than the 4-5 cups to get the right consistency. Or you can cut down on the amount of milk. Thank you for trying this recipe. I hope you find success! Let me know if you have any other questiins.
This post is likely a TL;DR for most, but has helpful info for anyone struggling with a wet dough.
Humidity or lack, thereof, is a long-prevailing myth regarding flour, but persists despite several well-known food scientists addressing this many years ago – Harold Mcgee, Kenji Lopez-Alt, and Shirley Corriher.
With that said, some basic chemistry shows while sugar is definitely hygroscopuc, flour is not. If flour were, mold would develop. Humidity affects flour at ~1%, which means no guess work or range of flour is used to determine flour amounts.
Professional bakeries would never be able to standardize a formula, if that were the case. Since all flour is a form of some type of wheat, it has more to do with growing wheat from season to season.
Even so, flour mfgs. know the type of flour being milled must adhere to a certain protein content for a consistent product.
With home bakers, the problem of soupy dough or dry dough most often lie with not noting the cup-to-metric equivalent, found on the side label of every U.S. product, improper measuring without a kitchen scale, and not using baker’s percentages (dividing each ingredient anount in grams by total flour amount in grams).
One need not use online converters, although USDA Nutritionix is a very accurate source.
Again, start with looking at the side label for every ingredient used.
For example, AP flour brands in the U.S. typically show 1 C = 120g or 4.25 OZ. A few may state 1 C = 135g. It is usually scaled to 1/4 C = 30g.
Note the amount of liquid, but consider eggs, as well. Know that fluid ounce is not equivalent to mass ounce. 1 C flour does not equal 8 OZ, but ~7.1 OZ. An accurate kitchen scale makes this easy.
If no scale, spoon and level, but do not scoop flour, as it packs more in.
Dividing total liquid amount by flour amount is a good guide for how wet or dry a dough is (hydration), which is using baker’s percentage.
In the formula above, considering U.S. customary aka imperial weights, 236g = 8 FL OZ.
So, total liquid weight is ~590g, with eggs ~45 – 50g, ea.
At the 5-C max amount of flour, 600g (based on 120g = 1 C), which when 590g in liquid is divided by 600g flour (590/600), hydration is 98%. This is definitely a challenge for some bakers to work with a wet dough at this level.
Yes, high hydration turns out uber-fluffy, soft, tender sweet breads and rolls, but for those not wanting to work with this wet of a dough, it can be dialed back a bit to 75% – 80%, which is still a fairly wet dough and still produces a product that stays fresh for days.
A technique I always use is to mix flour and liquid only and give it time for flour to absorb a lot of liquid (autolyse), which begins to develop gluten. Yes, even for sweet dough (60 – 90 minutes). Yeast may be added to form a sponge and develop more flavor.
Then, add eggs and salt and knead until dough begins to pull away from sides of bowl.
Add in butter and knead until dough forms a ball. Or Kneading time is decreased or it qualifies as a no-knead dough, which may sit in fridge up to 3 – 4 days. Then, a few stretch and folds are done to develop dough’s fluffy texture during baking.
BTW, the formula borders on a light brioche dough and the percentages for eggs, butter, salt are spot on.
I enjoyed reading this. Thank you for the science.
Don’t know why Kenji’s name appears as it does, but it is typed correctly above. Will omit hyphen (Kenji Lopez Alt), however, that is how he spells his name.
Correction to two typos above — “hygroscopic” and “1 C sugar does not equal 8 OZ, but ~7.1 OZ.”
I’ve tried so many cinnamon roll recipes and omg your dough has been the BEST so far. The sticky dough is the way to go. It came out perfectly soft and moist. Usually they’re chewy and a little dry with the other recipes I’ve tried, but your recipe was 100% amazing.
I’m so glad they worked out for you! That’s super exciting. Let us know if we can help you with anything else!
Love the ease of this recipe, I chose brown sugar, however, can you shed some light on why my cinnamon rolls cane out flakey with a cake-line consistency instead of elasticity in the roll when you pull apart?
Hmmm. I’m really not sure. The only thing I can think of is that you kneaded your dough either not enough or too much, therefore not having the gluten developed properly.
Best cinnamon rolls recipe ever. I had tried about 3 different recipes and they all came out tough however with this one, just pillow softness guaranteed. Thanks for sharing it.
Oh nice, I’ll try your recipie next time I make them! I have done them twice so far and the first time I actually did sprinkle sugar than cinnamon after because I didn’t want to make them overly sugary and they turned perfect, except that they were a little dry. This time I rubbed the sugar and cinnamon into he butter and it all melted! That said the melt tasted like toffee candies so something good came of it!
How many does this recipe make? I just want to know what size I should roll the dough out to. Thank you!
It makes 15-20 cinnamon rolls and I roll the dough out to about a 20×18-inch rectangle.
The cinnamon rolls look delicious, can’t wait to try this recipe. How many cinnamon rolls does it make? And also what size rectangle do you roll the dough out?
This recipe makes 15-20 cinnamon rolls and I roll the dough out to about a 20×18-inch rectangle.
I too had soup. I ended up adding 2 extra cups of flour (slowly and cautiously) and needed for 8-10 minutes, which I was way too much, but I didn’t know that until it was too late. I may have to scrap this dough and start again. Question: I start out with the mixer on low, but do I keep it on low throughout the 8-10 minutes of kneading?
Thank you. When making dough for cinnamon rolls, it will be a little stickier than regular bread dough. On speed, we start on 1 and go to 2 maybe 3 on the Bosch. Check the gluten about 6 minutes. It maybe ready in 6 minutes with a Bosch